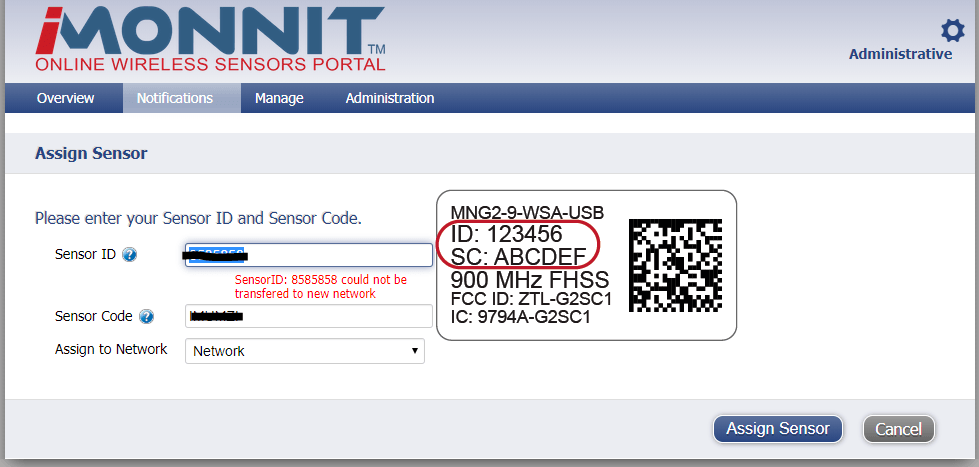
Legacy Enterprise - Adding Device "could not be transferred to a new network"


The error “[SensorID/GatewayID: xxxxxx] could not be transferred to a new network” may appear when attempting to add a new device to your iMonnit Enterprise server version 3.6.2.1 or earlier. This error may indicate one of a few issues. This article will address some possible causes and solutions to this message.
Possible causes for this message
- The Enterprise server is not connected to the Internet and is unable to retrieve the device metadata automatically.
- The device has already been added to the Enterprise database and is already added to another network within Enterprise.
- The request sent by the Enterprise server to retrieve device metadata is going unmet by Monnit’s lookup service as a result of a recent upgrade to TLS 1.2 encryption.
If the server hosting iMonnit Enterprise does not have access to the Internet
By default, the iMonnit Enterprise database does not contain any devices ID’s, so devices must be added to the database. Enterprise has the ability for the server to download the required metadata of the sensors and gateways from a central online repository, using the Sensor and Gateway ID’s and Codes. This is only available if the server hosting the web application has access to the Internet. Adding gateways and sensors to the database is done in the same manner as moving them between networks after they are in the database. From the “Manage” screen choose “Add Gateway/Add Sensor” and you will be prompted for the Gateway ID/Sensor ID and Code. These values are found on the ID labels affixed to the Monnit Gateways and Sensors.
Adding the devices manually
For the server administrator there is an area available only to that user, which provides a method of adding gateways and sensors to the database manually. This process should only be done if the server is unable to download the information from the central online database. Go to the account and network where you would like to add the device. Under Network Details in the “Administration” area you will find the links to manually add gateways and sensors. This area also allows you to quickly move gateways and sensors between your different account/networks.
If it is necessary to manually add the devices into the database you can look up the correct metadata from the iMonnit online portal. Using a web browser with Internet connection, navigate to: https://www.imonnit.com/lookup. Enter the sensor or gateway id and check-code into the form and the required metadata will be retrieved. Use this information to complete the form “Add new Sensor” to populate the database with your devices. Once the sensor has been entered into the database users will be able to move them between accounts using the device id and code found on the device labels.
To add a new gateway into the database:
- Select “Add New Gateway”.
- Enter the gateway ID from the sticker on the gateway
- Name the gateway
- Choose the correct gateway type
- Select the correct radio band (Management use only)
- Enter the correct APN Firmware Version (Management use only)
- Enter the correct Gateway Firmware Version (Management use only)
- MAC Address is (not required) can be entered if you look it up on your network.
- Click “Save”
To add a sensor to the database:
- Click "Add New Sensor"
- Select the correct Sensor Profile (It is critical t
- operation that this information is entered correctly)
- Enter the sensor ID from the bottom of the sensor
- Name the sensor
- Choose the correct type of sensor
- Commercial
- Commercial (AA)
- Industrial
- Wi-Fi
- Enter the firmware version
- Select the power source
- Commercial (CR2032)
- Commercial (AA)
- Line Power
- Voltage
- Industrial (Tadiran)
- Industrial Solar (Ind Rech)
- Custom (AAA)
- Custom (CR123)
- Wi-Fi (AA)
- Click Save
If the device has already been added to a network
This message may also appear if the device has already been added to the database and is currently on another network. To determine if this is the case, follow the steps below.
- Log in as the server Administrator.
- Click the Administration tab in the navigation bar.
- Click the Reports tab in the navigation bar.
- In the Device ID field, enter the device ID.
-
Click Submit.
o If the device has not yet been added to the database, you will see the text, “Not Found”.
o If the device has been added to the database, the Account and Network fields will display where the device has been added.
If the Enterprise server is unable to complete the request as a result of the TLS 1.2 upgrade
Enterprise version 3.6.2.1 and earlier were developed with support for TLS 1.1. Since these versions were released, Monnit upgraded the encryption used when communicating with our servers to TLS 1.2. Since Enterprise 3.6.2.1 and earlier attempt to communicate using TLS 1.1, these requests go unmet by Monnit servers. Therefore a patch to your Enterprise server may be required to address this issue. To apply the patch follow the steps below.
-
Download the Footer.ascx file at the following link: http://downloads.imonnit.com/misc/Footer.zip .
You will need to extract the Footer.ascx file from the .zip file you downloaded.
-
Replace the existing Footer.ascx file in the following default location:
C:\inetpub\wwwroot\Enterprise\Views\Shared\Note: the location mentioned above is the default location. If your server was installed in a different directory, copy the file to the corresponding location.